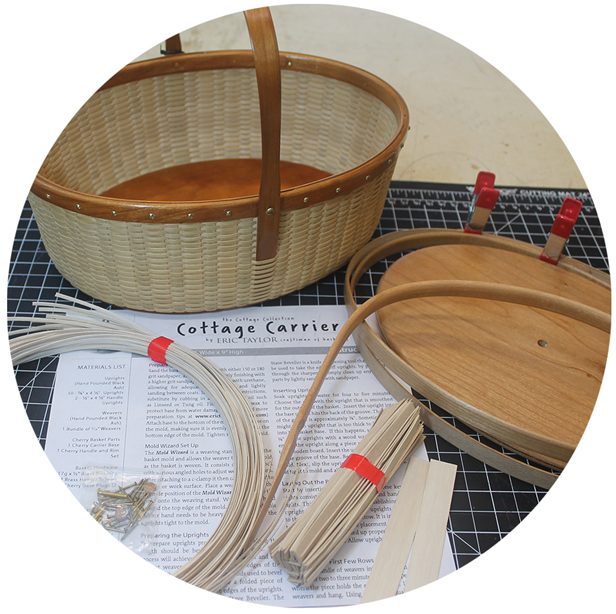
How To Part 2: Rimming & Finishing

Online guide to complete an Eric Taylor Basket Kit
I'm Eric and I teach the craft of basketry.
Congratulations if you are now on Part Two! It’s time to get your rims and handle on.
I know this is the stage of the basket that gets some folks a little scared. Don’t be! I will break it down into small steps with photos and videos showing exactly how to use the tools properly so you can finish your basket with great results.
Again, you will need some tools...
Just as I did in the “weaving” tools section, I will show you the specific tools needed for finishing your basket.
Tools for Rimming & Finishing
There are some tools that you are going to need to have and then there are some tools that it would be nice to eventually have if you continue to make a lot of my baskets.
Rimming & drilling...
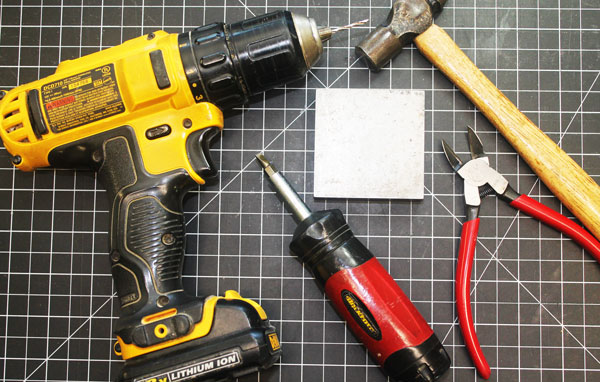
For the rimming stage, you will need some good clamps—strong ones. You will also need a tool that will drill the holes for the rim pins and is one of the most important tools needed in completing one of my baskets. I will go over your drill tool options, including the 'pros' and 'cons' for each.
CLAMPS or CLIPS: To attach the rims you will need clips or clamps. The common small spring clips can be used but I use Irwin Quick Grip 1 ½” clamps. They have a ratchet and get a real tight grip on the rims with little effort.

Note: they only work well on flat or flat-oval rims, such as my baskets. If you have a half-oval rim, they will fall off.
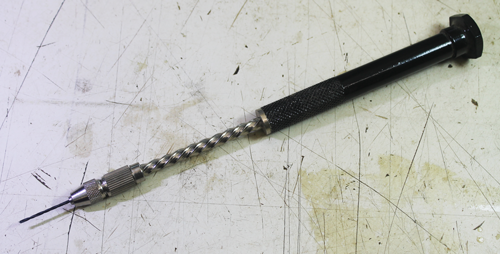
HAND PIN VISE: this tool accepts small drill bits and is pushed up and down to drill precise holes in the wood of your rims.
Pro:
It’s cheap—under $20. And you quickly have what you need. It’s precise in that it slows you down, lessening the chance of making a mistake and, it doesn’t take much effort to drill the holes. This is great for first timer that wants to see if this craft is what they would like to further pursue.
Con:
This is a slower process. If you want to make multiple baskets, and both faster and easier, you will want to move up to a mini drill press.
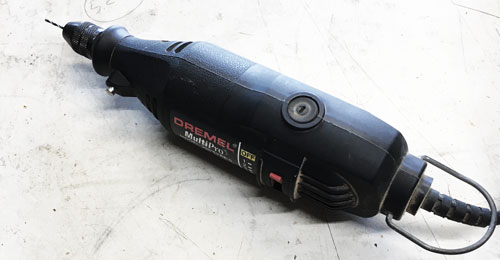
DREMEL or ROTARY DRILL: I know people have used and wanted to mention it here. However, I do not recommend it unless you are very experienced with its use.
Pro:
It drills the holes fast. But again, you need to be very steady and experienced using this type of tool.
Con:
It's fast but you can mess up your rims quickly. It’s hard to control and drill straight—Why practice on a basket that you have been working on for hours? The hand Pin Vise is a better option if you don't have a drill press.
The mini drill press...
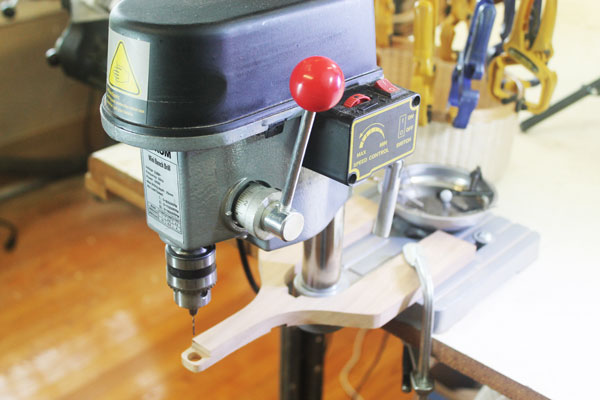
This is one of those tools you should have if you’re going to make many of my baskets. It may look intimidating to some, but it’s not. Be sure to look at the videos and see how easy it is to operate. There are multiple models available on the market. I’ve been more in favor of the MicroLux bur recently, I’m leaning more towards the SE 3-Speed shown in photo.
Pro:
Gives you the best chance at the perfectly lined up hole.
Con:
The only thing I can come up with is the initial investment, but we are only talking around $100. This can be used for a host of other craft projects besides baskets. Overall, no con.
In the photo, you can see a “Jig” which will help in drilling more precise holes. I make the jigs for the MicroLux and this SE model and are available in the store. (More info on my “jigs” below.)
Note on this model:
Over the years I have purchased four MicroLux mini drill presses. With my heavy use, I have burned out two motors. Recently, I was looking to purchase another. Because the price on the MicroLux is approx. $200, I did some looking around for a less expensive one for students. I found this model for under $100. I was pleasantly surprised. It is more bulky than the MicroLux but it is still small and gives you very precise drilling. The motor might be even stronger and has variable speeds, which is nice to have.
Hand tools for finishing...
Now to the final group of tools you will need for finishing your basket.
Cordless drill:
Used for the handle holes. I recommend using a a drill that is on the smaller size—easier to be accurate when drilling the holes.
Screw driver with small regular bit:
I use a ratchet type because it is much faster. If you don't have one, see the store for my recommendation. I also show in the 'handle' video how to use it.
Small ball pein hammer:
A 4-oz. hammer is the size you need for most baskets. You don’t want to use anything larger. On baskets 4” and under, drop down to a 2-oz. hammer.
Jewelers bench block:
You can substitute this with any metal surface. I also recommend the round one I have in the store because there's no bounce-back with the rubber bottom and is super easy to use.
Flush cutters:
This is a very, important tool. It must be a flush cutter to get the pins cut as close to the rim as possible.
Drill & rim pin jigs...
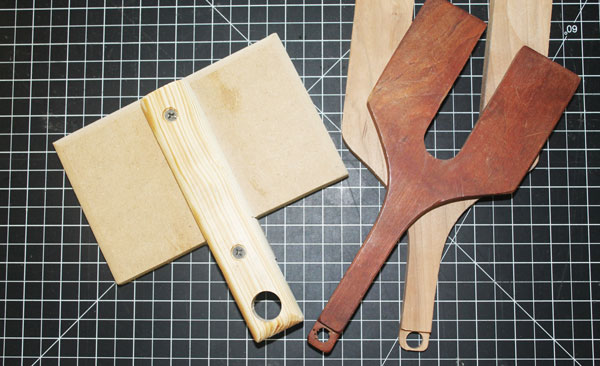
A drill jig is needed if you are using a drill press for drilling rim pin holes. What is great about a drill jig is that it can be adjusted so that you get the holes drilled dead center of the rim. In the image, there are two sizes: one I made for the MicroLux drill press and the other is for the SE 3-speed drill press used in the videos. You can make this yourself or you can order one from me.
The rectangle rim pin jig is not a must have but you may find it a lot easier getting the pins in. You can see how I use this in the video. You also can make it at home. All you need is a one-inch wide pine board with a ½”-hole drilled near the end of the board. Clamp down to a good solid surface and you’re all set. I also make and sell this as well.
Basket hardware...
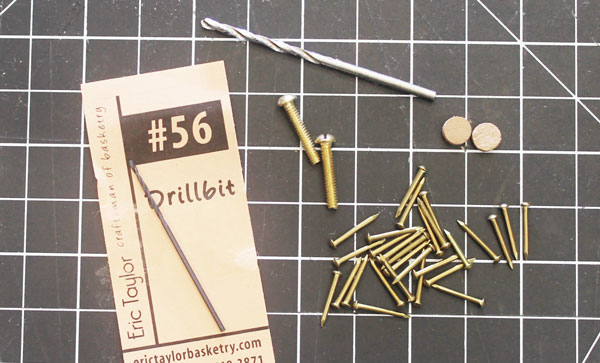
The Cottage Baskets are all finished with solid Brass Hardware. The rims are held together with brass Escutcheon pins. Handles are held together with mostly #4 brass machine screws. Some of the smaller basket handles are held together with #2 brass machine screws. I will provide the hardware in your kit, except for the drill bits.
Drill bit sizes:
- 18 gauge Brass Escutcheon Rim Pins require a #56 drill bit.
- #4 Brass Handle Screws requires a 3/32”
- #2 Brass Handle Screws requires a 5/64”
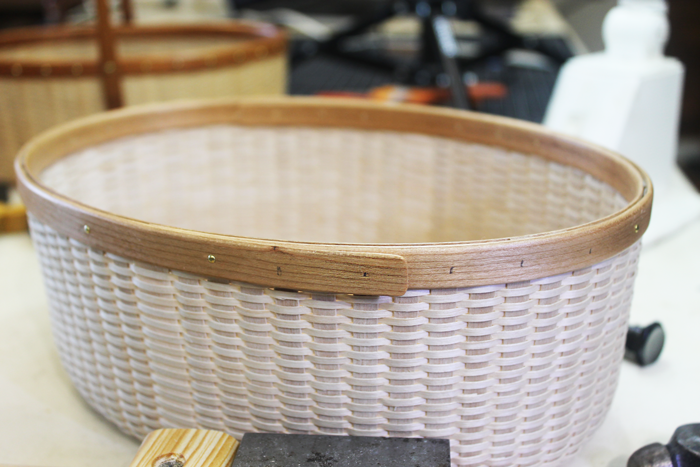
Clamping & Setting the Rim Pins
After clamping your rims, I strongly suggest that you read the rest of the sections first, and watch the videos, before doing anything to your basket.
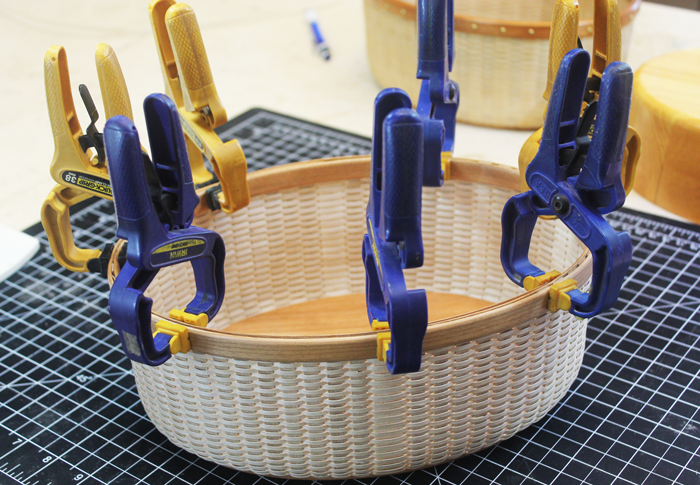
To attach the rims, you will need clips or clamps (as I mentioned in the “tools” section). All of my Cottage Baskets have flat or flat-oval shaped rims so you need strong clamps. Forget about using clothes pins—they are useless—as they don’t have enough strength.
Follow each step in the video for the easiest way to put your rim on. Notice that I put the inside rim in with the overlaps closest to me. Then with the overlap on the opposite side, place the first clip in the center closest towards you. With this first clip on, you will have your hands free to make adjustments. The rims should sit snug, right above the last row of weavers. If you leveled your weavers to the pencil line properly, your rims will end up being level. Squeeze out the space between the rims tightly as you can and clip.
Tip:
Check your rims to make sure that they were put in at the proper angle. Look straight down on your basket to see if you set your rims in properly. For instance, if you are making an oval like the Cottage Carrier, make sure to oval rims are placed in the baskets and lines up with the oval shape of the base. First time basket makers might not think of this until it is too late. The results will be a catawampus looking basket.
Setting the first rim pins...
Watch video above on how to set the first rim pins.
To increase window while viewing, hit the small double box icon in top left corner. If it remains small, hover over a corner and it will let you expand window size.
For demonstration purposes the video shows me using the drill press in my shop. I also, included a short clip of using the pin vise in video below.
The first step is to put a #56 drill bit in the drill press and align the drill jig up so that the holes will drill exactly in the center of your rims. Holes are to be spaced every other upright. Mark the uprights that are to be drilled with a pencil. Start marking by skipping the first upright next to the handle.
When drilling the first holes, it is a little cumbersome with all the clamps on. So, my number one goal is to get them off as soon as possible. Notice in the video which holes and pins are put in first. Skipping the upright next to the handle, place one pin on either side of the handle. Then do the other side of the basket followed by placing one on each end. Now the rim is held together and all the clamps can come off. Cut the pins and tap down as in the video.
How to use a pin vise:
Important Note!!!
The single most important part of rimming the basket is cutting the pins as close as you can to the rim. Leaving the pins too long leads to cracked rims. When the pin is too long, it requires more pounding to flatten it out. During all of this hammering, the pin bends in between the two rims. You will not know this until it is too late when you see you have split your rims. See my tips below to help you avoid this.
My tips on cutting and peining...
Remember, cutting the pins as close as possible is crucial!
- Push down while cutting pins. Make sure there is a hard surface under the rim as you are cutting, like a jewelers block.
- With your finger, run across the cut pin. If it feels like you can clip more off, try. Use the tip of the cutter and attempt to snip some more off.
- Use a lot of light taps and not be heavy-handed. If you find that you are hitting it hard, then its most likely because the pins are too long. When I hear a student wailing on their basket, I rush over quickly before they break their rim. I’ve been known to say "you're making a basket not building a house." Keep that in mind.
- When tapping the pins, use the flat end whenever possible. The reason? You are less likely to dent the rims when using the round end. Sometimes when making baskets with sharper corners or ovals, you will have no choice but to use the round end—extra light taps then.
- When tapping practice slightly sliding the hammer in different directions as you hit the pin. This helps in spreading the brass out as opposed to hitting straight up and down.
- If you do split a rim, don’t panic. It can be repaired. Pull the nails out in that area. Take a short cut-off piece of weaver and dip it in wood glue. Start getting the glue into the split of the rim. Clip the rim with small spring clips along the split. Once dry, sand the excess glue off. Drill the holes where you took pins out. Put pins in and be ginger when cutting and only a few taps. Because the split is along the grain of the wood, you will hardly see it.
How to use drill & rim pin jigs...
The hard part is now over!
All the rest of the pin holes can be drilled. Once all the clamps are off the basket you can use a rim pin jig if you wish—it makes it a little easier getting the pins in. In the video I am using the both jigs. First the drill jig, then the rim pin jib.
Video shows how to use the rim pin jig.
Note: Sometimes the tip of the rim falls in the wrong place. In other words, you do not want to place a pin too close to the end of the rim as this may lead to splitting. Another scenario is that the rim extends far beyond the pin so that it sticks up. In this case, you will need to trim some of the rim off and sand the end to round over. Pins on a basket this size should be no closer than 3/8” from the end of the rim.
Handle Time!
You’re almost there! Time to put on the handle and complete the finishing touches.
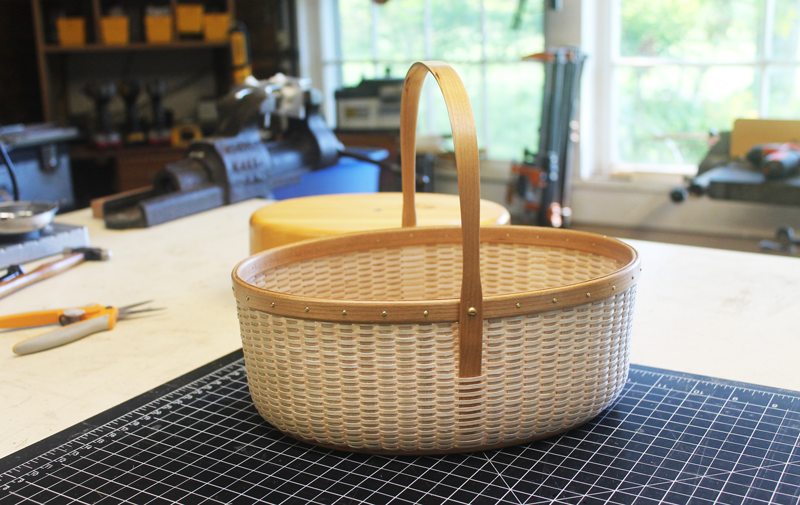
All that’s left is to follow the video, place your plugs and pilot the handle holes, insert the handle, final sanding, varnishing and you have completed an Eric Taylor Basket all on your own!
In this video I show putting in the two cherry half-plugs and putting the handle in. I make my own half-plugs as I have found it far better than an end-grain dowel which has to be sawn off and almost always leads to scratches on the base.
Lastly, the finishing touches. I run sandpaper over the inside rim to get all the pins super smooth. I sand the inside base and basket’s bottom with a fine worn piece of sandpaper. Wipe dust off and gel varnish two more coats on all the cherry parts.
Share Your Basket!
Now that your basket is done would you like to show it off? Click button to submit your basket photo and we’ll feature it here on the website and the blog.